If you have a website, you probably also have an SSL certificate on it and the thing about SSL certificates is that they have to renewed every year, even if you purchased one for multiple years. In this post I break down the renewal process into 3 easy steps that you can follow along, so that you are up and running in no time at all.
1 Create CSR (Certificate Signing Request)
- Log into your cPanel (hosting account)
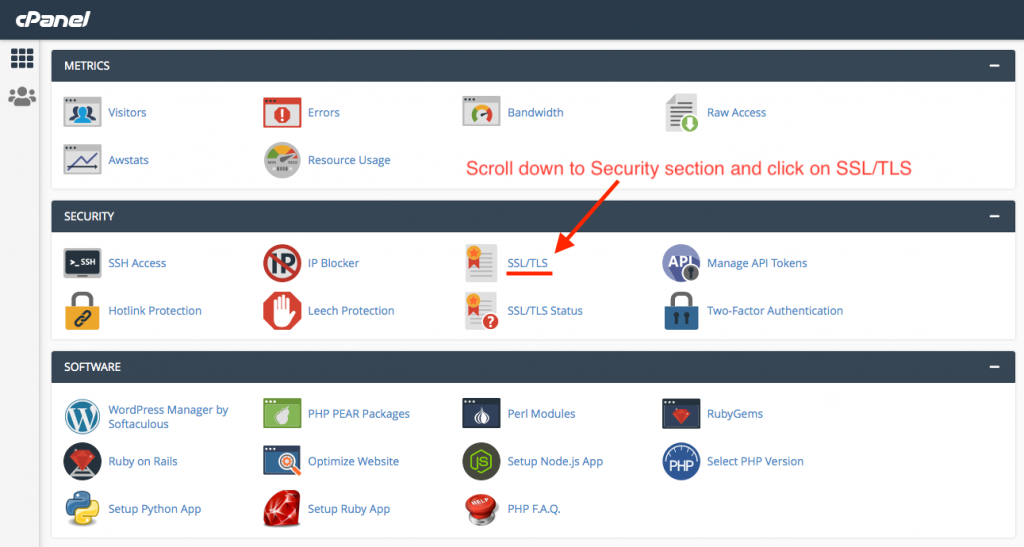
- Scroll down to the Security section
- Click on “SSL / TLS”
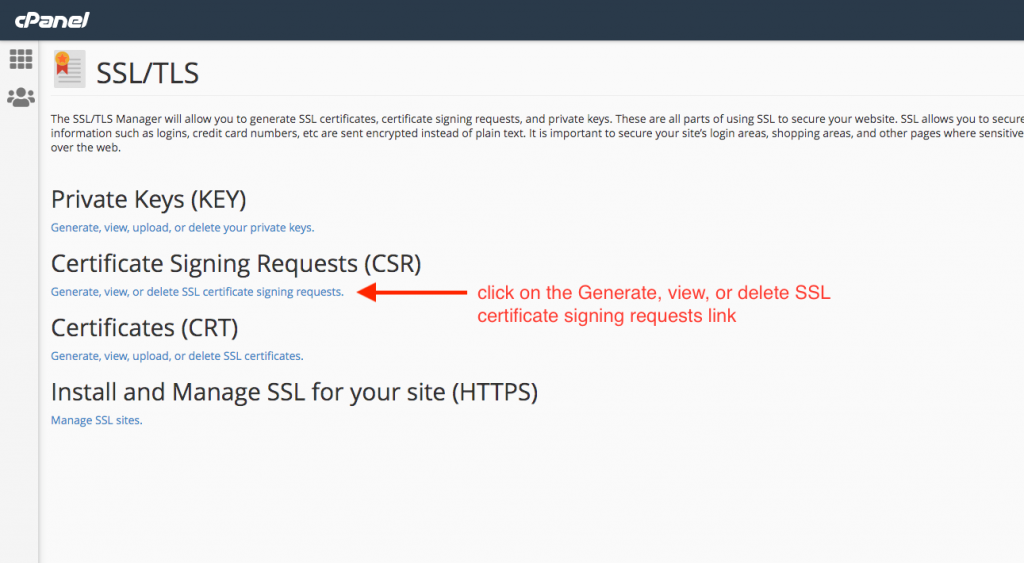
- Then under the Certificate Signing Request (CSR) heading click on the “Generate, view, or delete SSL certificate signing requests” link
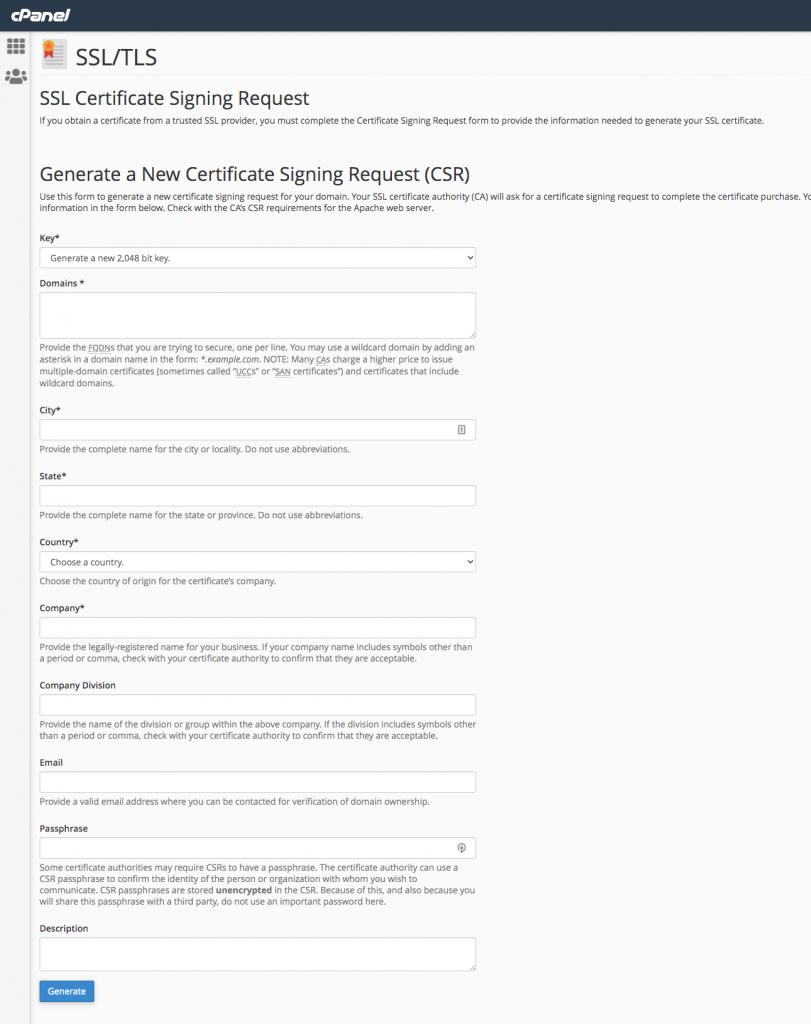
- Fill in your information
- Domain name: this can be just the domain name followed by the .com, or with www before, example: domain.com or http://www.domain.com
Other fields that are required are:
- city
- state
- country
- company
- Click generate
- Copy the text/code it generates
2. Activate and Verify Certificate
- In your hosting account, find you new SSL certificate and activate it.
- Enter in the text/code into the CSR field and set email as your verification method. It will also ask what email address to send the code to, you may use the same address or a different one.
- Check you email inbox and when you get the verification email, click the link and enter in the verification code that was included in the email message.
- Then wait for the email with your SSL certificate.
3. Install your SSL
- After you get the email with your SSL certificate, log back into your cPanel and go back to the SSL / TLS link.
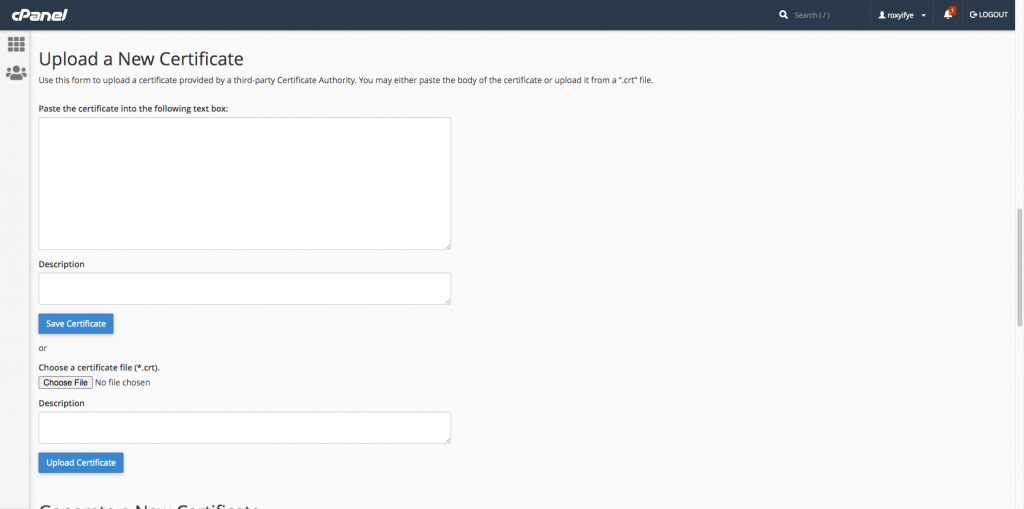
- However this time you will go under the Certificate heading and click on the “Generate, view, upload, or delete SSL Certificate”
- Paste in the certificate code or upload the file with the certificate.
- Then click on the Save Certificate button.
- Now go the the section with all your installed certificates and find the one you just added and click install.


